Concrete and DIY are one-in-the-same in today’s world. While that is wonderful for smaller home projects, your driveway is another story.
There are many people who have tried to “DIY” (Do-It-Yourself) their way through a driveway installation, only to find out that it requires a lot more experience, know-how, and precision than they had initially thought.
Large-scale concrete installation is a very time-sensitive process since the material being installed is transforming from a semi-solid state to a solid state literally by the minute.
Without a proper understanding of the timing and quantities needed to properly mix and place concrete at the peak of its viability, you can end up with a huge mess on your hands. Not to mention that once the concrete is set into place, it’s going to be extremely difficult to fix.
Why You Should Not DIY Your Concrete Driveway Installation
Installing a concrete driveway requires a lot of skill and specialized knowledge. Due to the many variables that are involved in mixing, placing and finishing concrete, it’s a job that is best left up to a professional paving contractor.
That being said, here is a basic overview of the steps that your contractor will take to install your concrete driveway:
Our Concrete Driveway Installation Process
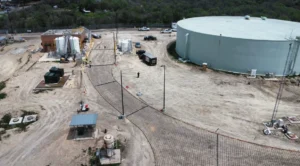
1. Preparing the Subgrade
Subgrade refers to the actual ground upon which the pavement will be poured. There are some regions of the country where a contractor can simply pour the mixture right on top of the native soil because the composition of the soil allows for a direct overlay.
Other regions, however, have soil that is rich in clay or other types of minerals that expand when they come into contact with moisture, and this can pose a real problem for a paving installation.
Once the soil begins to expand, it can place tremendous pressure on the underside of the slab, creating all the conditions necessary for cracking to begin.
In fact, this is one of the main reasons why cracking in pavement occurs – if it was laid on top of a subgrade that is subject to soil expansion, it’s only going to be a matter of time before the cracks start showing up.
So, for those regions of the world where a direct overlay simply isn’t possible, an additional layer of material known as a subbase will need to be installed before the area can be paved.
But before anything happens, the subgrade will still need to be leveled off and tightly compacted to ensure optimal stability and support for the subbase and slab that will go on top of it.
This can include removing loose rocks, leaves, tree stumps, and other vegetation that could cause surface irregularities.
The entire subgrade preparation process can take anywhere from 1-2 days up to a couple weeks, depending upon factors such as the size and scope of the project, as well as the region in which you live.
Once the subgrade has been properly cleared and compacted, it will be ready for the next step.
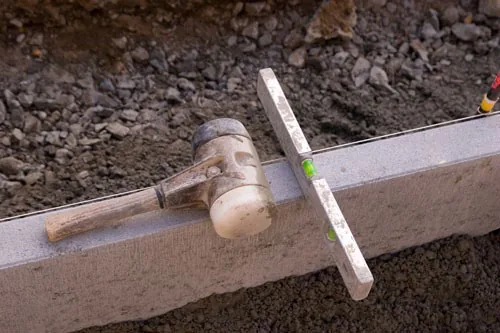
2. Setting the Forms
The word “forms” refers to the beams of wood that are used to designate the shape and size of the intended driveway.
Much like the borders of a sandbox, the forms designate the outside edges of each side of the pavement, giving your contractor the much-needed parameters to begin the installation.
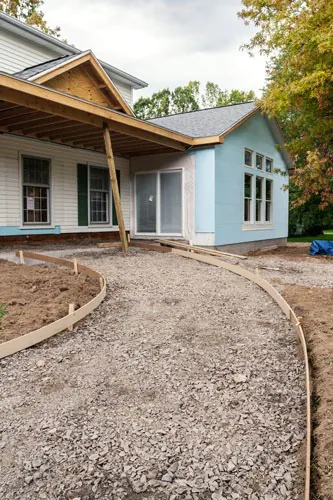
3. Installing the Subbase
The subbase is typically a layer of gravel that is laid on top of the subgrade to provide extra support for the soon-to-be-installed pavement.
The thicker the subbase, the more weight the concrete slab will be able to handle.
So if the driveway is being designed to hold heavy vehicles (e.g. large trucks, RVs, etc.), your paving contractor might recommend installing a thicker subbase.
One huge advantage of installing a subbase is that it can provide what’s known as a “capillary break” to keep groundwater from seeping into the slab.
It’s much easier for water to creep up into the slab via capillary action (i.e. the ability of liquid to flow into substances without the aid of external forces like gravity), when there’s no barrier between it and the slab above it.
With a gravel subbase, however, water will have a much tougher time traveling through that thick layer of crushed rocks in order to get to the bottom of the slab.
The average thickness of a subbase layer will be around 4 inches for a concrete driveway but once again, this can be increased or decreased at the discretion of your paving contractor depending on the specific needs of your project.
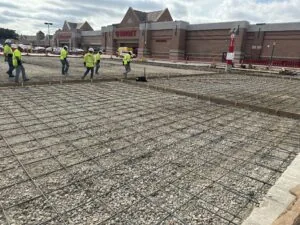
4. Placing the Concrete
When your paving contractor “places” the concrete, that basically means that they’re pouring the semi-solid mixture into the predetermined area and working it into place as it hardens.
This normally requires a crew of about 5-10 people (depending on the size of the concrete project), and because the consistency of the concrete mix is changing by the minute, precision and attention to detail are a must.
The average concrete driveway slab is normally around 4 to 6 inches thick, depending on what load stresses the surface is intended to withstand.
As the wet concrete begins to fill the forms, the paving crew will manipulate the mixture as needed to create a smooth surface that is as level as possible.
In this sense, the word “level” does not refer to being completely flat, as we know that there are many driveways that sit on a slope; it actually refers to having an even surface without dips, bulges, or other surface aberrations.
One of the biggest factors that your paving contractor will pay attention to is drainage. Without adequate drainage, your driveway can experience all kinds of problems due to ponding water or storm-water runoff heading in the wrong direction.
Nobody wants to deal with a garage or home that floods every time it rains due to an improperly graded driveway.
That’s why your paving contractor will take great pains to ensure that your concrete driveway – from the subgrade all the way to the surface layer of the pavement – has been adequately graded to allow for optimal drainage.
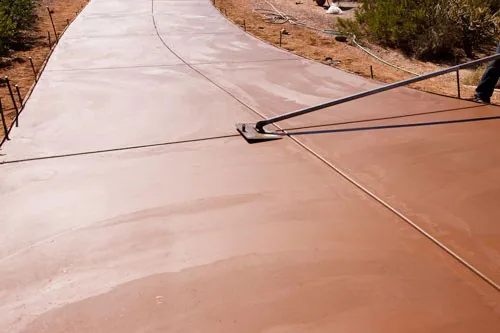
5. Finishing the Concrete
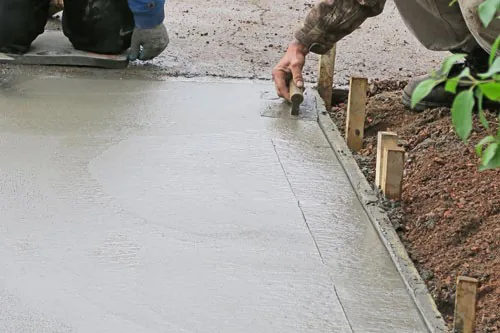
During this phase, your paving contractor will make sure that the semi-wet mixture has been properly leveled and smoothed out by removing excess paving material and getting rid of bumps or other surface irregularities.
The finishing process also helps to bring some of the finer aggregate particles to the top of the pavement, while pushing the rougher aggregate particles further into the slab.
This creates a smoother surface, along with achieving a better overall appearance.
Since concrete is a semi-liquid mixture when it is first placed, it will change in volume once it cures. Just like a sponge will usually shrink and become smaller when it’s dry versus when wet, concrete can be subject to shrinkage once it dries as well.
A typical concrete slab will usually shrink to the tune of about one-sixteenth of an inch per 10 feet of pavement.
This is the reason why your paving contractor will intentionally put “control joints” (straight grooves) in the pavement – it allows this natural contraction to take place.
So when the concrete eventually dries and shrinks, the cracks can follow these pre-set joint lines instead of forming in unsightly places.
6. Curing
The curing process is a must for concrete to achieve its full strength. The exact amount of time it will take to cure will depend on several factors including the slab thickness, outdoor temperature, and the compression strength of the concrete.
In most cases, a concrete driveway will be ready to drive on in about a week or so, but you should always go with the advice of your paving professional.
Unfortunately, many unskilled contractors can sabotage the future strength and hardening of a pavement installation by not allowing the slab enough time to properly cure.
Once again, this demonstrates why it so important to choose an experienced and trustworthy Austin paving contractor to install your new driveway.
Some people mistakenly believe that the concrete dries out completely during the curing process, but this is slightly inaccurate.
It might surprise you to learn that concrete takes a really long time to fully “dry out” as it undergoes a slow, ever-evolving chemical process that causes the mixture to continually get harder and stronger.
In fact, even 50 years after the installation has taken place, concrete still actually contains a tiny fraction of water within its composition.
This is why, as we mentioned earlier, the Hoover Dam is still undergoing the curing process even though the last sections of concrete for the dam were placed in 1935!
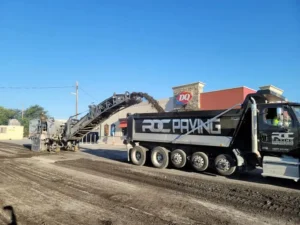
Trust RDC with Your Concrete Driveway Installation
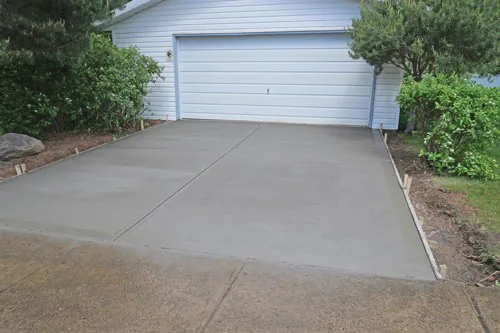
Concrete driveways can add significant value and curb appeal to your home, and they are an excellent choice for a durable, low-maintenance pavement.
If you’ve been thinking about getting your driveway paved (or even repaved) with concrete, enlist the help of RDC Paving.
You can feel confident you’ll get the ultimate results you’re looking for. Contact us today to give your driveway – and the exterior of your home – a beautiful new look.